

Disclaimer: this blog will go over carpet deep cleaning steps you can do yourself, but it is always recommended you contact a professional like Nu-England Services to ensure maximum effectiveness for carpet cleaning. No DIY method will ensure full satisfaction and sometimes can cause additional problems. At Nu-England Services, we offer a satisfaction guarantee and use the best tools in the industry on carpets.
Deep cleaning your carpet can feel overwhelming and messy. Most people assume a quick vacuum is enough, but that barely scratches the surface. Experts say carpets can hold up to four times their weight in dirt and allergens, making simple cleaning routines almost useless. The trick is knowing the hidden steps that pull out all that grime and leave your floors cleaner than you ever imagined.
Table of Contents
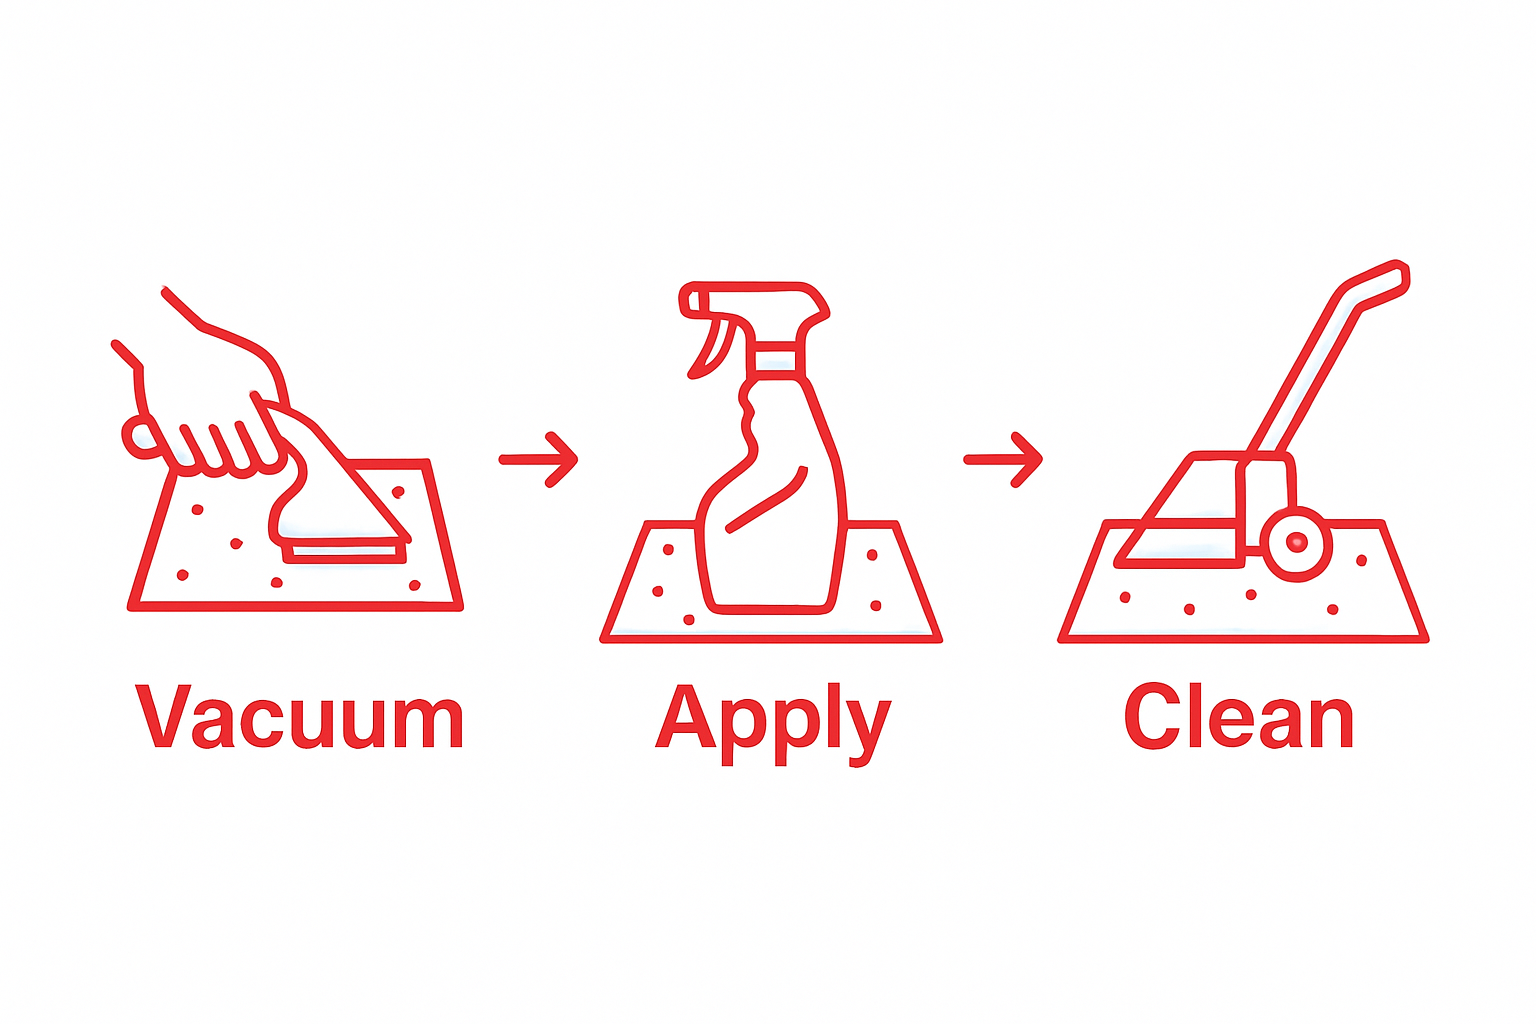
Quick Summary
| Key Point | Explanation |
|---|---|
| 1. Thoroughly evaluate carpet condition | Inspect your carpet for stains, wear, and damage to determine the best cleaning method. |
| 2. Gather the right cleaning supplies | Assemble necessary tools like a vacuum, cleaning solution, and brush to ensure effective cleaning. |
| 3. Vacuum thoroughly before deep cleaning | A comprehensive vacuuming removes dirt and dust, preventing it from turning muddy during cleaning. |
| 4. Apply cleaning solution evenly | Distribute cleaning solution uniformly to tackle dirt without oversaturating the carpet fibers. |
| 5. Allow proper drying and inspect results | Ensure the carpet dries completely to avoid mold, and verify cleaning effectiveness through visual inspection. |
Step 1: Evaluate Your Carpet Condition
Carpet deep cleaning starts with a thorough evaluation of your carpet’s current condition. Understanding the specific challenges and wear patterns will help you determine the most effective cleaning strategy. Before diving into the cleaning process, take time to carefully inspect your carpet from multiple angles and under different lighting conditions.
Begin by performing a comprehensive visual assessment. Look closely for visible signs of wear, discoloration, stains, and accumulated dirt. Pay special attention to high traffic areas like hallways, entryways, and spaces near furniture. Dark or compressed carpet fibers often indicate significant ground-in dirt that requires more intensive cleaning techniques. Run your hand across different sections of the carpet to feel the texture and compaction level.
According to the Carpet and Rug Institute, assessing carpet condition involves examining multiple factors beyond surface appearance. Check for subtle signs of damage such as fraying edges, loose threads, or areas where the carpet pile has been permanently flattened. These details will help you understand whether a standard cleaning will suffice or if you might need professional restoration services.
To conduct a comprehensive evaluation, gather a few essential tools: a bright flashlight, white cloth or paper towels, and potentially a magnifying glass. The flashlight will help reveal dirt and stains that might be invisible under normal lighting. Gently press a white cloth against different carpet sections to test for color transfer or hidden grime. If significant discoloration appears on the cloth, this indicates deep-seated dirt requiring thorough extraction.
Key evaluation criteria include:
- Color changes or discoloration
- Visible stain patterns
- Fiber texture and compaction
- Edges and seam conditions
- Overall carpet age and wear level
Remember that different carpet materials require unique assessment approaches. Wool carpets, synthetic blends, and natural fiber carpets each present distinct characteristics that influence cleaning methods. By taking time to thoroughly evaluate your carpet’s condition, you’ll set the foundation for a more effective and targeted deep cleaning process.
Step 2: Gather Necessary Cleaning Supplies
Preparing for a comprehensive carpet deep cleaning requires assembling the right tools and supplies. This critical step ensures you have everything needed to tackle dirt, stains, and embedded grime effectively. A well-organized approach will streamline your cleaning process and help you achieve professional-level results without unnecessary interruptions.
Professional carpet cleaning begins with selecting the right equipment and cleaning solutions tailored to your specific carpet type. Start by gathering a comprehensive set of cleaning tools that will address different aspects of carpet maintenance. Your primary arsenal should include a high-quality vacuum cleaner with strong suction and multiple attachment heads, which allows you to reach difficult areas and remove loose debris before deep cleaning.
According to the Washington State Department of Enterprise Services, selecting environmentally friendly and low-toxicity cleaning products is crucial. Look for carpet cleaning solutions that are certified by reputable third-party organizations and free from harsh chemicals. These products not only protect your carpet fibers but also maintain a healthier indoor environment.
Essential supplies for your carpet deep cleaning toolkit include:
- Carpet cleaning solution or shampoo
- White microfiber cloths
- Soft bristle brush
- Spray bottle
- Bucket
- Protective gloves
- Carpet extraction machine or wet vacuum
Consider the specific characteristics of your carpet when selecting cleaning solutions. Wool carpets require gentler treatments compared to synthetic fibers, and some materials are more sensitive to moisture and chemical interactions. Test any new cleaning solution on a small, inconspicuous area first to ensure it does not cause discoloration or damage.
Prepare your workspace by clearing the area of furniture and removing smaller items. This allows you to access the entire carpet surface and prevents potential damage to your belongings during the cleaning process. Organize your supplies within easy reach, ensuring you can move efficiently and maintain a systematic approach to carpet deep cleaning.
Here is a concise table to help you organize all the essential carpet deep cleaning supplies, including their use and any special considerations to ensure an effective cleaning process.
| Tool/Supply | Purpose | Special Considerations |
|---|---|---|
| Vacuum cleaner | Removes loose dirt and debris | Use with various attachments for all areas |
| Carpet cleaning solution | Breaks down dirt and stains | Choose formula safe for your carpet type |
| White microfiber cloths | Blotting stains, testing carpet | Prevents color transfer; check for residue |
| Soft bristle brush | Agitates embedded stains and grime | Gentle action to avoid damaging fibers |
| Spray bottle | Even application of cleaning solution | Aids in controlled, uniform distribution |
| Bucket | Holds water for rinsing and dilution | Keeps solution readily available |
| Protective gloves | Protects hands from chemicals | Necessary when handling any cleaning products |
| Carpet extraction machine/wet vacuum | Extracts solution and dirt | Needed for thorough deep cleaning results |
Step 3: Vacuum Thoroughly Before Deep Cleaning
Thorough vacuuming is the foundational step that prepares your carpet for an effective deep cleaning process. This critical stage removes loose dirt, dust, and debris that could otherwise become mud-like when combined with cleaning solutions, potentially causing more significant staining or damage during the deep cleaning process.
Comprehensive vacuuming requires more than a quick pass over the carpet surface. Begin by selecting the appropriate vacuum attachment for different carpet areas. Use wider floor attachments for open spaces and crevice tools for edges, corners, and tight spaces between furniture. Move furniture strategically to access hidden areas that typically accumulate the most dirt and dust.
According to the Carpet and Rug Institute, proper vacuuming technique is just as important as the equipment you use. Work in systematic, overlapping patterns to ensure maximum dirt removal. Move slowly and deliberately, allowing the vacuum’s suction to pull out embedded particles. High-traffic areas require multiple passes in different directions to dislodge stubborn dirt trapped deep within carpet fibers.
Pay special attention to these often overlooked areas:
- Along baseboards and wall edges
- Underneath furniture
- Corners and tight spaces
- Areas near entryways
- Spaces around and under heavy furniture
Inspect your vacuum cleaner before starting. Ensure the bag or canister is not full, filters are clean, and brush rollers are free from tangled hair or debris. A well-maintained vacuum performs more effectively and prevents redistributing dirt back into the carpet. For carpets with deep pile or shag-like textures, consider using a vacuum with adjustable height settings to optimize suction and brush roll contact.
Complete your vacuuming process by doing a final visual and tactile inspection.
Run your hand across the carpet surface to feel for any remaining grit or rough patches. If you notice significant resistance or dirt transfer, repeat the vacuuming process. A thoroughly vacuumed carpet will feel smoother, look brighter, and be perfectly prepared for the deep cleaning stages that follow.
Step 4: Apply Cleaning Solution Evenly
Applying cleaning solution evenly represents a critical phase in carpet deep cleaning that determines the overall effectiveness of your restoration process. This step requires precision, patience, and a strategic approach to ensure complete coverage without oversaturating the carpet fibers. The goal is to distribute the cleaning solution uniformly, targeting dirt and stains while protecting the carpet’s underlying structure.
Begin by selecting a cleaning solution specifically formulated for your carpet’s material composition. Different carpet types demand unique chemical treatments, so understanding your carpet’s specific requirements is paramount. Pour the cleaning solution into a spray bottle or use the application system on your carpet cleaning machine, which allows for more controlled and consistent distribution.
According to the General Services Administration, technique matters as much as the product itself. Start applying the solution from the furthest corner of the room, working systematically toward the exit. This approach prevents you from walking on freshly treated areas and ensures complete coverage. Use smooth, overlapping motions to create an even layer of cleaning solution across the carpet surface.
Key application strategies include:
- Maintain consistent spray distance
- Use circular motions for even distribution
- Avoid oversaturating any single area
- Work in manageable sections
- Keep solution application light and consistent
Pay special attention to high-traffic areas and visible stains. These zones might require slightly more cleaning solution, but be cautious not to create oversaturated patches. For stubborn stains, allow the cleaning solution to sit for a few minutes before proceeding to the next stage. This brief dwell time helps break down tough dirt and grime, making subsequent extraction more effective.
Verify your application by checking for uniform moisture and solution coverage. The carpet should appear evenly damp without any dry spots or puddles. A consistent sheen across the surface indicates proper application.
 Take a moment to step back and visually inspect your work, ensuring you’ve maintained a methodical and thorough approach throughout the cleaning process.
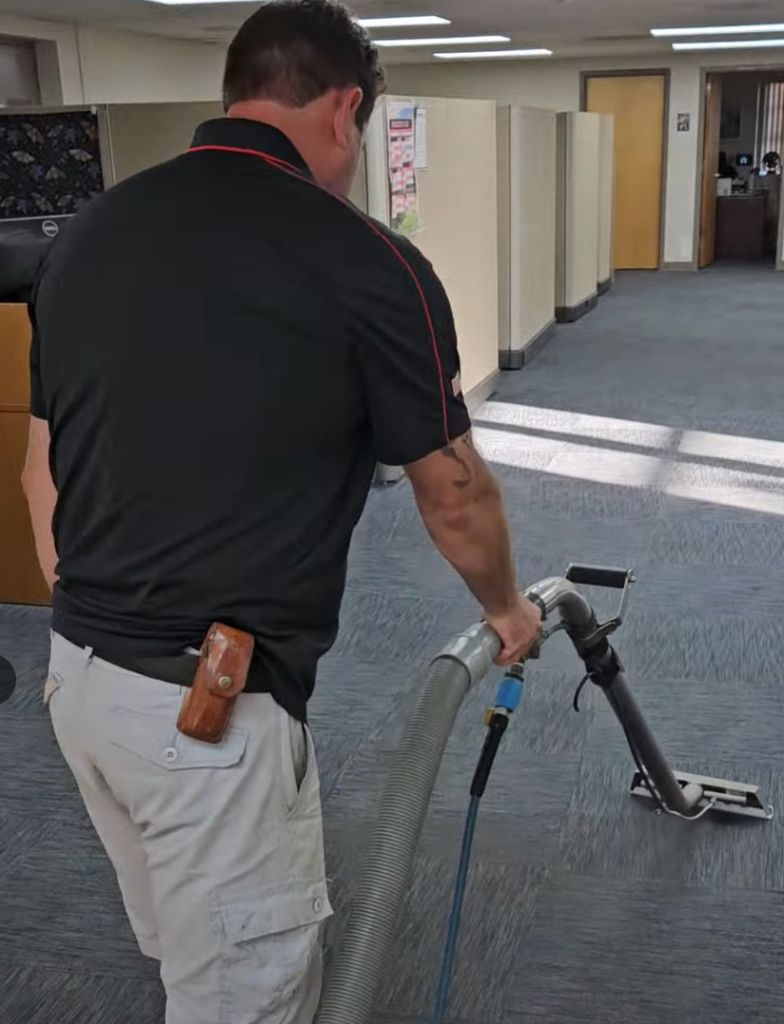
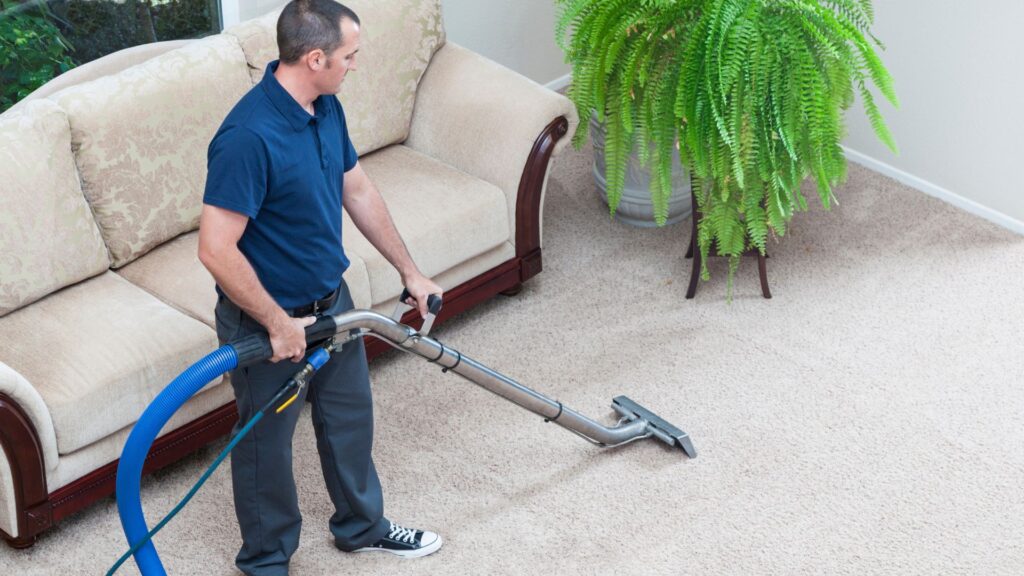
Step 5: Use Carpet Cleaner or Steam Cleaner
Using a carpet cleaner or steam cleaner represents the most intensive phase of your deep cleaning process, where accumulated dirt and grime are systematically extracted from carpet fibers. This step transforms your preliminary preparation into a thorough restoration of your carpet’s appearance and hygiene. The right technique can dramatically improve your carpet’s overall cleanliness and extend its functional lifespan.
Professional carpet cleaning requires methodical movement and consistent pressure when operating your cleaning equipment. Begin by carefully reading the manufacturer’s instructions for your specific carpet cleaner or steam cleaning machine. These devices typically work by injecting hot water and cleaning solution deep into carpet fibers, then immediately extracting the dirty water through powerful suction mechanisms.
According to the Centers for Disease Control and Prevention, proper cleaning of soft surfaces like carpets involves using appropriate cleaning products and techniques. Start in the corner farthest from the room’s exit, working systematically toward the door to avoid walking on freshly cleaned areas. Move the machine slowly and deliberately, allowing sufficient time for the cleaning solution to penetrate and the extraction process to remove deeply embedded dirt.
Key operational techniques include:
- Maintain consistent machine speed
- Overlap cleaning passes by 50 percent
- Use parallel, straight lines for even coverage
- Adjust machine settings for different carpet pile heights
- Empty and refill water/solution tanks as needed
Pay special attention to high-traffic zones and areas with visible staining. These sections might require multiple passes or slightly slower machine movement to ensure thorough cleaning. Some advanced carpet cleaners offer specialized settings for different carpet types and soil levels, so experiment with these features to optimize your cleaning results.
Verify your cleaning effectiveness by observing the extracted water.
As you progress, you should notice a significant color change from clear to progressively darker, indicating the removal of accumulated dirt. The final passes should produce nearly clear water, signaling that you have successfully deep cleaned your carpet and restored its original texture and appearance.
Step 6: Allow to Dry and Inspect the Results
The final stage of carpet deep cleaning involves carefully managing the drying process and conducting a comprehensive inspection to ensure your hard work has produced the desired results. This critical phase determines the ultimate success of your cleaning effort and helps prevent potential issues like mold growth or residual moisture damage.
Create optimal drying conditions by maximizing air circulation and reducing indoor humidity. Open windows if weather permits, and strategically position fans to promote air movement across the carpet surface. Position fans at different angles to ensure complete and even drying. Ceiling fans can also help accelerate the process, creating continuous airflow that prevents moisture from becoming trapped within carpet fibers.
According to the U.S. Environmental Protection Agency, carpets and their underlying backing must dry within 48 hours to prevent mold development. Use dehumidifiers in rooms with limited ventilation to extract excess moisture from the air. Keep the room temperature moderate, avoiding extreme heat or cold that could impede the drying process.
Important drying considerations include:
- Avoid walking on damp carpet
- Keep pets and children away from wet areas
- Use multiple fans for large spaces
- Monitor humidity levels
- Check carpet backing for moisture
Conduct a thorough visual and tactile inspection once the carpet is completely dry. Run your hand across different sections to check for any remaining dampness or stiffness. Look closely for any spots that might have been missed during cleaning or areas where stains persist. If you notice any problematic zones, you may need to spot treat or repeat the cleaning process for those specific areas.
The final verification involves a comprehensive assessment of your carpet’s appearance and texture. A successfully deep cleaned carpet should look brighter, feel softer, and demonstrate a renewed vibrancy. The fibers should stand more upright, and any previous discoloration or dinginess should be significantly reduced. Take a moment to appreciate your thorough cleaning effort and the refreshed environment you’ve created.
Review this quick reference table summarizing the main steps of carpet deep cleaning, including each step’s focus and key outcome, to help keep your process organized from start to finish.
| Step | Main Focus | Key Outcome |
|---|---|---|
| 1. Evaluate Carpet Condition | Inspect for stains, wear, and damage | Determines best cleaning approach |
| 2. Gather Cleaning Supplies | Assemble all needed tools and products | Ensures uninterrupted workflow |
| 3. Vacuum Thoroughly | Remove loose dirt and debris | Prevents dirt from becoming mud during clean |
| 4. Apply Cleaning Solution Evenly | Distribute cleaning solution uniformly | Maximizes cleaning effect, avoids oversoak |
| 5. Use Carpet/Steam Cleaner | Extract dirt using machine | Deep cleans carpet fibers |
| 6. Allow to Dry & Inspect Results | Promote drying and check for leftover problem areas | Prevents mold, ensures desired outcome |
Transform Your Home with Expert Carpet Deep Cleaning Support
You have just learned the essential steps to revive your carpets, from careful evaluation to thorough cleaning and proper drying. But sometimes stubborn stains, persistent odors, or years of ground-in dirt can make even the most determined DIY efforts fall short. High-traffic areas, delicate fibers, and lingering dampness are real obstacles that can make deep cleaning stressful and uncertain. That is where true professional care makes all the difference.
Are you ready to experience carpets that look, feel, and smell brand new, without the worry and hassle?

Trust Nu-England Services to bring decades of expertise, eco-friendly products, and state-of-the-art equipment right to your door. Our certified team specializes in residential and commercial carpet and rug cleaning, plus full-service cleaning, restoration, and specialty solutions across New England. We understand local homes and know how to achieve the results you want. Request your free personalized quote now — give your carpet the professional transformation it deserves today.
Frequently Asked Questions about Carpet Deep Cleaning Steps
What is the first step in deep cleaning carpets?
Evaluate the carpet’s condition by inspecting it for stains, discoloration, wear patterns, and damage. This assessment will help you determine the appropriate cleaning methods.
How can I choose the right cleaning supplies for my carpet?
Select cleaning solutions that are specifically formulated for your carpet type, considering factors like fiber composition and any known sensitivities. Use eco-friendly products whenever possible to maintain indoor air quality.
Why is thorough vacuuming important before deep cleaning?
Thorough vacuuming removes loose dirt and debris that can turn muddy when wet, potentially damaging carpet fibers and impacting the effectiveness of the deep cleaning process.
How long should I allow my carpet to dry after cleaning?
Allow your carpet to dry completely within 48 hours to prevent mold growth and other moisture-related issues. Use fans and dehumidifiers to expedite the drying process.